

pythonのWebフレームワーク、Djangoにチャレンジ!–その4:Djangoで自作のWebページを作る方法–
この度は、株式会社ウェブネーションをご訪問頂き、誠にありがとうございます。
今回は、巷で人気のプログラミング言語python、その中のWebフレームワーク、djangoを使ってWeb開発にチャレンジしてみましたので、その手順の一部を紹介いたします。
しかしながら、内容の規模が少々大きく見込まれるため、いくつかパートに分けて紹介いたします。今回はDjangoで自作のWebページを作る方法です。
最後までお読みいただけますと幸いです。
前提条件
- Windowsではコマンドプロンプトが、Macではターミナルが起動できていること
- 下記2点の言語/ツールがインストールされていること
- python
- pip ← pythonのパッケージ管理ツール
- Djangoの仮想環境構築やパッケージ管理ができる環境になっていること
- Docker Desktopがインストールされており、かつこのツールで環境構築ができるようになっていること
- Docker経由で、データベースのマイグレーションが自動でできるようになっていること
- 下記のディレクトリ構成になっていること
boards
├── .env
├── Dockerfile
├── Pipfile
├── Pipfile.lock
├── boards
│   ├── __init__.py
│   ├── admin.py
│   ├── apps.py
│   ├── management
│   │   ├── __init__.py
│   │   └── commands
│   │       ├── __init__.py
│   │       └── createcustomsuperuser.py
│   ├── migrations
│   │   ├── 0001_initial.py
│   │   └── __init__.py
│   ├── models.py
│   ├── tests.py
│   └── views.py
├── config
│   ├── __init__.py
│   ├── asgi.py
│   ├── settings.py
│   ├── urls.py
│   └── wsgi.py
├── docker-compose.yml
├── manage.py
└── requirements.txt
前置:docker-compose.ymlの変更
本題に触れる前に、docker-compose.ymlを下記の通りに変更します。
# docker-compose.yml
boards-app:
  build: ./
    command: >
       # ----------- 変更箇所(始) ------------
        sh -c "sleep 5 &&
          python manage.py migrate &&
          python manage.py runserver 0.0.0.0:8000
       "
       # ----------- 変更箇所(終) ------------
上のように変更を加えるのは、下記2点の理由によるものです。
- createsuperuserコマンド(Djangoで用意されているコマンド)は自動で入力できるように対応されておらず、これをdocker-compose.ymlに直接組み込むと、appサーバ起動時に処理が止まってしまい、サーバーが起動できなくなるため。
- createcustomsuperuserコマンド(独自のコマンド)も、docker-compose.ymlに組み込むと、appサーバ起動時に「CommandError: Error: That ユーザー名 is already taken.」というエラーが発生し、それが何度も発生するのはパフォーマンス上不適であるため。
実際、修正前であるその3のコードで、既にビルドしたコンテナをもう一度立ち上げたところ、appサーバが起動せずページが開けなくなっていました。
その事態を回避するために上のような手順を踏む必要があります。
加えて、管理者権限の作成とDBの変更に伴うマイグレーションを、必要な時にいつでも動かせるようにMakefileで管理します。
まずはMakefileをコマンドで作成します。
cd boards  # 一番上の階層
touch makefile # Makefileの生成
続いて、管理したい機能を下記の通りに書きます。
# マイグレーションが必要な時(テーブルの生成等):初回用
init-migrate:
	python manage.py makemigrations
	python manage.py migrate

# マイグレーションが必要な時(テーブルの生成等)
migrate:
	python manage.py migrate

# 管理者権限の自動作成
create-admin:
python manage.py createcustomsuperuser --username ${ADMIN_USER} --password ${ADMIN_PASSWORD} --email ${ADMIN_EMAIL} --noinputこの状態で保存したらいつでも実行できますが、念の為に現在ビルドされているコンテナ(boards-app)を一旦削除し、こちらのコマンドで再ビルドしてください。
なお、Makefileを含んだディレクトリにて、Dockerターミナルで「make 〇〇」と入力して、Enterキーを押下すれば、〇〇の中身のコマンドが実行されます。
例えば、先ほどのコードの一番上ならばmake init-migrateと入力して、Enterキーを押下すると、最初のpython manage.py makemigrationsから順に、コマンドが一つずつ実行されます。
それでは、前置きは以上とさせていただき、ここから本題に入っていきます。
Viewの生成
URLの設定
Web上で画面を見れるようにするには、URLの設定が必要不可欠です。
まず、URLの設定を行う前に、boards/config/setting.pyにて、変数ROOT_URLCONFを下記の通りに変更します。
# boards/config/setting.py
MIDDLEWARE = [
    ...
    'django.middleware.clickjacking.XFrameOptionsMiddleware',
]

# ----------- 変更箇所(始) ------------
ROOT_URLCONF = 'boards.urls'
# ----------- 変更箇所(終) ------------

TEMPLATES = [
    {
        'BACKEND': 'django.template.backends.django.DjangoTemplates',
    ...
そうすれば、URLを管理するファイルがconfig(デフォルトではこのディレクトリでURLが管理される)からboardsに変更され、そのディレクトリでURLが設定ができるようになります。
※上のように変更する理由は後述
図解すると下のような流れになります。
boards
├── Dockerfile
├── ...
├── boards <- ココに変更
│   ...
└── config <- ココから
    ├── __init__.py
    └── ...
続いて、boardsディレクトリにurls.pyをコマンドで生成して、下記の通りにURLを設定します。
今回は「localhost:8000/posts/list」のURLに対応した画面を表示できるように設定します。
touch urls.py# boards/urls.py、アプリ内のURL
from django.urls import path
from boards.views.posts import list
from django.contrib import admin
# ルートを設定
urlpatterns = [
path("posts/list/", list),
# 管理者用 今回は触らず、コードを書くにとどめる
path('admin/', admin.site.urls),
]ViewフォルダとViewの生成
DjangoでViewを書くときは、views.pyにまとめて書くという方法が一般的とされていますが、こちらの記事では大規模なシステムを作る想定の元、viewsフォルダを生成してその中にViewを書いていきます。なお、下記2点の記事を参考にしました。
- django開発で肥大化したview.py を複数ファイルに分割する方法
- djangoの関数ベースビュー作り方とviewの分割方法 – IT総合Wiki CWiki
※URLを設定/管理するディレクトリをconfigからboardsに変更したのは、この手法で開発をできるようにするため
まず、マウス操作でviews.pyをゴミ箱へ移動して、viewsフォルダを生成するためのコマンドを入力します。
cd boards # 最上部ではない方のboardsディレクトリへ移動
mkdir views
続いて、Viewを動かすのに必要なファイルを作成し、オブジェクトの設定も兼ねて画面に表示できるようにするためのコードを書きます(コードはクラスベース)。
# viewsフォルダ内の各pythonファイルをコマンドで確保
cd views
touch __init__.py
touch posts.py
# boards/views/__init__.py
from .posts import list# boards/views/posts.py
from django.views.generic import TemplateView
from typing import Any
import datetime
class PostsList(TemplateView):
template_name = 'posts/list.html'
def get_context_data(self, **kwargs: Any) -> dict[str, Any]:
result = [
{
'id': 1,
'message_title': 'あああああ',
'body': 'あああああああああ',
'user_name': 'User0001',
'post_at': datetime.datetime.now(),
},
{
'id': 2,
'message_title': 'いいいいいい',
'body': 'いいいいいいいいいいいい',
'user_name': 'User0002',
'post_at': datetime.datetime.now(),
},
]
context = super().get_context_data(**kwargs)
context = {
'title':'投稿一覧',
'messages':result
}
return context
list = PostsList.as_view()このコードで使われている変数/オブジェクト(get_context_data()以外はいずれも自作)は主に下記の通りになります。
- PostsList: posts/list.htmlをTemplateとして画面に表示するクラス、今回はdjangoで用意されているTemplateViewから継承
- result: HTMLの画面に表示する自作データ
- context( = super().get_context_data() ): 自作データを含めたTemplateに渡すためのオブジェクト。なお、get_context_data()の取り扱いは、下記の記事を参考にしました。
- 【django】get_context_dataの使い方とコンテキスト情報の取り扱い方法 | みかん箱でプログラミング
Templateの生成
Templateの生成による画面の表示
Viewの生成ができたら、次はTemplateを生成していきます。
まずは、下記のコマンドを入力します。
cd ../ # 最上部ではない方のboardsディレクトリへ移動
mkdir templates
cd templates
touch common.html # 共通で表示する部分のHTMLを、postsディレクトリとは離れたところで生成
mkdir posts
cd posts
touch list.html
以上が完了したら、下記のHTMLコードを作成します。
<!-- boards/templates/common.html -->
<!DOCTYPE html>
<html lang="ja">
<head>
    <meta charset="UTF-8">
    <meta name="viewport" content="width=device-width, initial-scale=1.0">
    <title>{{title}}</title>
</head>
<body>
    {% block content %}
    {% endblock %}
</body>
</html>
<!-- boards/templates/posts/list.html -->
{% extends 'common.html' %}
{% block content %}
<h1>{{title}}</h1>
<hr>
{% for message in messages %}
<div><p>{{message.message_title}}</p></div>
<div><p>{{message.body}}</p></div>
<div><p>{{message.user_name}}が投稿</p></div>
<div><p>{{message.post_at}}</p></div>
<hr>
{% endfor %}
{% endblock %}このコードで使われている構文は主に下記の通りになります。なお、HTMLとして表示されるDjangoのTemplateでは、構文は「{% ~ %}」と、変数/オブジェクトは「{{}}」と、それぞれ表記されます。
- {% extends 〇〇.html %}: 別のHTMLコードから継承。上のコードの場合、boards/templates/common.htmlから継承されている。
- {% block 〇〇 %} ~ {% endblock %}: 継承先で埋め込むコード。継承元であるboards/templates/common.htmlで埋め込みたい箇所を決め、その箇所を継承先であるboards/templates/posts/list.htmlでコードを書くことが可能。なお、〇〇の箇所はブロック名で、名前は任意だが、継承元と継承先で名前を同一にする必要がある点に注意が必要。
- {% for 〇〇 in △△ %} ~ {% endfor %}: 繰り返し可能な複数のオブジェクト△△を、〇〇という一つのオブジェクトとして繰り返し処理を行う。
ここまで進んだら、ブラウザを立ち上げて「http://localhost:8000/posts/list/」をURLに入力してEnterキーを押してみてください。
下のような画面が表示できたら成功です。
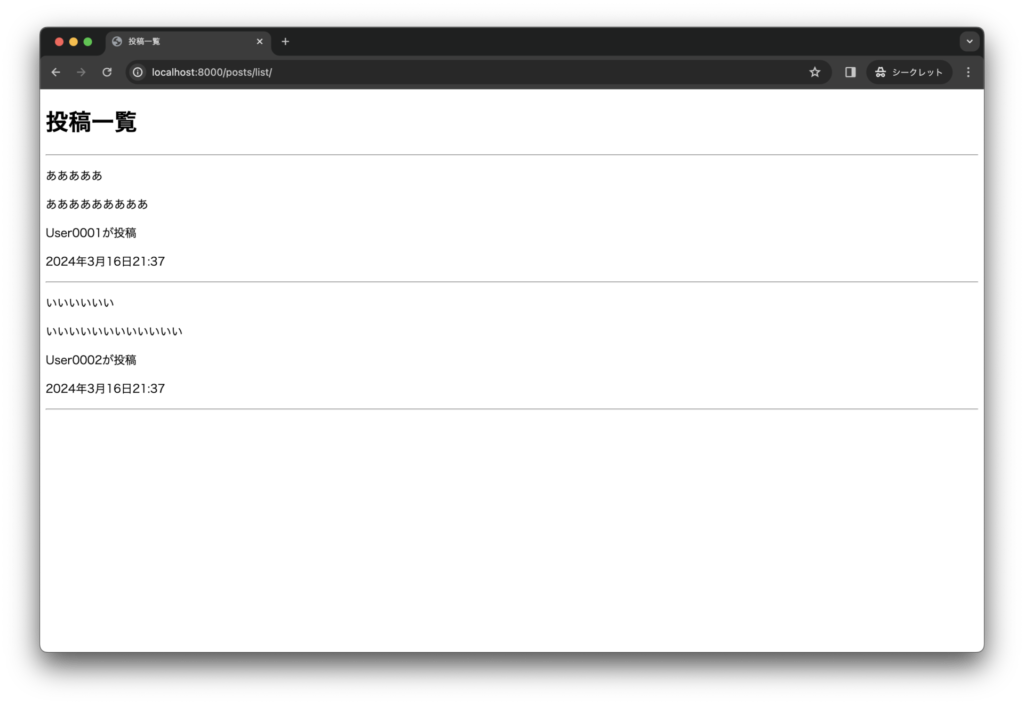
なお、この時点でのディレクトリは下記の状態になると思います。
boards
├── .env
├── Dockerfile
├── Pipfile
├── Pipfile.lock
├── boards
│   ├── __init__.py
│   ├── admin.py
│   ├── apps.py
│   ├── management
│   │   ├── __init__.py
│   │   └── commands
│   │       ├── __init__.py
│   │       └── createcustomsuperuser.py
│   ├── migrations
│   │   ├── 0001_initial.py
│   │   └── __init__.py
│   ├── models.py
│   ├── templates
│   │   ├── common.html
│   │   └── posts
│   │        └── list.html
│   ├── tests.py
│   ├── urls.py
│   └── views
│       ├── __init__.py
│       └── posts.py
├── config
│   ├── __init__.py
│   ├── asgi.py
│   ├── settings.py
│   ├── urls.py
│   └── wsgi.py
├── docker-compose.yml
├── makefile
├── manage.py
└── requirements.txt
他のTemplateも画面に表示してみる
ついでに、他の画面も表示できるかやってみましょう。
まず、先ほどと同じように、URLを設定していきます。
# boards/urls.py、アプリ内のURL
from django.urls import path
# ----------- 変更箇所(始) ------------
from boards.views.posts import list, detail
from boards.views.profile import index
# ----------- 変更箇所(終) ------------
from django.contrib import admin

urlpatterns = [
    # ----------- 変更箇所(始) ------------
    path("posts/list/", list, name="list"),
    path("posts/detail/", detail, name="detail"),
    path("profile/", profile, name="profile"),
    # ----------- 変更箇所(終) ------------
    # 管理者用 今回は触らず、コードを書くにとどめる
    path('admin/', admin.site.urls),
]
続いて、他に必要なviewsフォルダを生成するためのコマンドを追加で入力します。
cd views
touch profile.py
そして、他の各Viewについて、オブジェクトの設定も兼ねて、画面に表示できるようにするためのコードを追加で書いていき、必要に応じて修正もします。
# boards/views/__init__.py
# ----------- 変更箇所(始) ------------
from .posts import list, detail
from .profile import index
# ----------- 変更箇所(終) ------------
# boards/views/posts.py
from django.views.generic import TemplateView
from typing import Any
import datetime
class PostsList(TemplateView):
template_name = 'posts/list.html'
...
class PostDetail(TemplateView):
# ----------- 変更箇所(始) ------------
template_name = 'posts/detail.html'
def get_context_data(self, **kwargs: Any) -> dict[str, Any]:
result = {
'message_title': 'あああああ',
'body': 'あああああああああ',
}
context = super().get_context_data(**kwargs)
context = {
'title':'投稿詳細',
'message':result
}
return context
# ----------- 変更箇所(終) ------------
list = PostsList.as_view()
# ----------- 変更箇所(始) ------------
detail = PostDetail.as_view()
# ----------- 変更箇所(終) ------------# boards/views/profile.py
from django.views.generic import TemplateView
from typing import Any
class Profile(TemplateView):
template_name = 'profile/index.html'
def get_context_data(self, **kwargs: Any) -> dict[str, Any]:
context = super().get_context_data(**kwargs)
result = {
'name': '田中 太郎',
'name_kana': 'たなか たろう',
'age': '32',
'address': '〇〇県△△市□□町××-1234',
'email': '[email protected]',
'introduction': 'よろしくお願いします。',
}
context = {
'title':'プロフィール',
'profile': result,
}
return context
index = Profile.as_view()このコードで使われている変数/オブジェクト(いずれも自作)は主に下記の通りになります。
- PostDetail, Profile: それぞれposts/detail.html, profile/index.htmlをTemplateとして画面に表示するクラス、いずれもdjangoで用意されているTemplateViewから継承
最後に、他に必要なTemplateを生成するためのコマンドを追加で入力して、Templateを生成/修正します。
cd ../templates/posts
touch detail.html
cd ../
mkdir profile
cd profile
touch index.html
<!-- boards/templates/posts/list.html -->
{% extends 'common.html' %}
{% block content %}
<h1>{{title}}</h1>
<hr>
{% for message in messages %}
<div><p>{{message.message_title}}</p></div>
{% comment %} ----------- 変更箇所(始) ------------ {% endcomment %}
<div><p><a href='{% url "detail" %}'>{{message.body}}</a></p></div>
<div><p><a href='{% url "profile" %}'>{{message.user_name}}</a></p></div>
{% comment %} ----------- 変更箇所(終) ------------ {% endcomment %}
<div><p>{{message.post_at}}</p></div>
<hr>
{% endfor %}
{% endblock %}<!-- boards/templates/posts/detail.html -->
{% extends 'common.html' %}
{% block content %}
<h1>{{title}}</h1>
<div><p>{{message.message_title}}</p></div>
<div><p>{{message.body}}</p></div>
{% endblock %}<!-- boards/templates/profile/index.html -->
{% extends 'common.html' %}
{% block content %}
<h1>{{title}}</h1>
<div>
<p>氏名:{% with profile.name|add:'('|add:profile.name_kana|add:')' as profile_name %}
{{ profile_name }}
{% endwith %}</p>
</div>
<div><p>年齢:{{profile.age}}</p></div>
<div><p>メールアドレス:{{profile.email}}</p></div>
<div><p>住所:{{profile.address}}</p></div>
<div><p>自己紹介:{{profile.introduction}}</p></div>
{% endblock %}このコードで使われている構文は主に下記の通りになります。
- {% url “〇〇” %}: ドメイン名より後のURLを出力(例えば、リンク先が「posts/detail」ならば、「http://localhost:8000/posts/detail/」をリンクとしてURLを出力する)。「”〇〇”」の箇所は、boards/urls.pyのurlpatternsの中にある、pathメソッドの第二引数nameに対応(例えば、{% url “detail” %}ならば、pathメソッドの第二引数にある「name=”detail”」がそれに対応している)。
- {% with 〇〇 %} ~ {% endwith %}: with~endwithの範囲内においてオブジェクト/変数を使用できる。例えば、Templateで変更を加えたオブジェクトを、特定の範囲内でしか使いたくないような場合は、with~endwithを使うことが推奨される。
- {% 〇〇|add: △△ %}: 文字列結合もしくは数値の合算を行う。左ならば△△を〇〇に結合/合算させる。
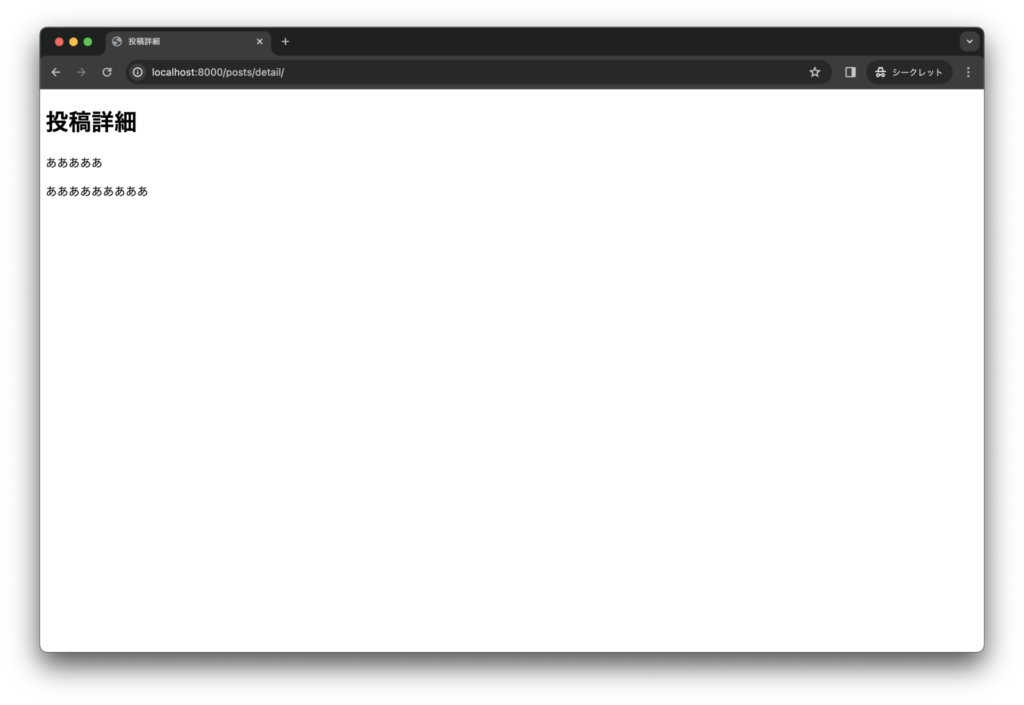
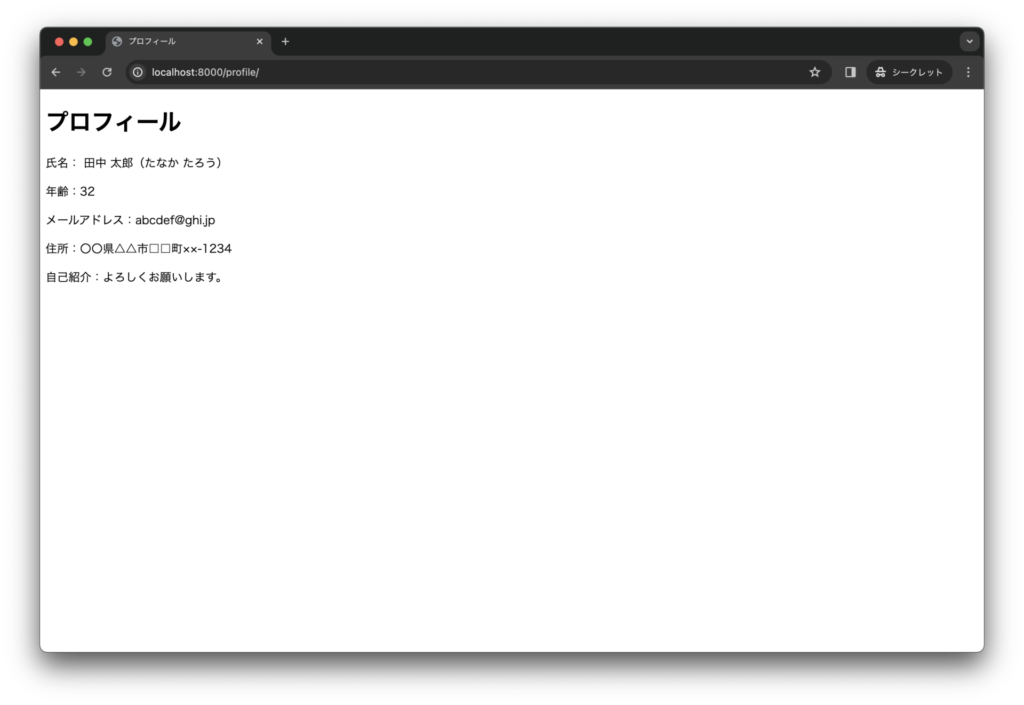
下の画像3点に表示されている、URLとブラウザ画面の内容が合致していたら成功です。
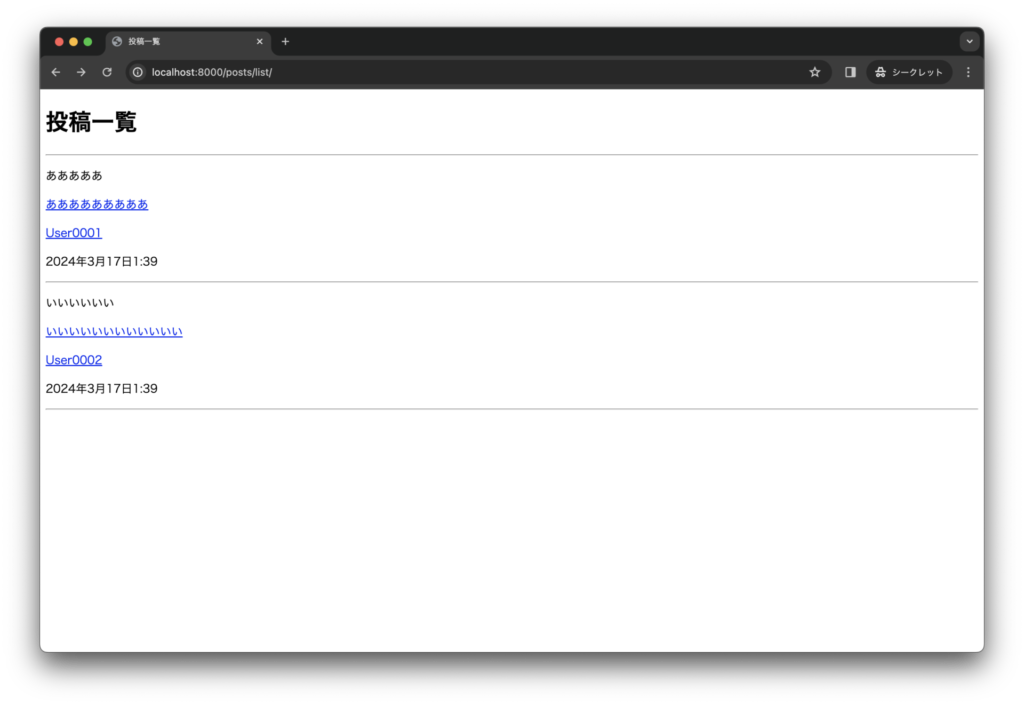
※上の画像の各メッセージにありますリンクにつきましては、いずれをクリックしましても、それぞれ「localhost:8000/posts/detail」「localhost:8000/profile」に遷移されます。リンクごとに差別化して画面を表示させる方法は今回は省略します。
なお、ここまでの時点でのディレクトリは下記の状態になると思います。
boards
├── .env
├── Dockerfile
├── Pipfile
├── Pipfile.lock
├── boards
│   ├── __init__.py
│   ├── admin.py
│   ├── apps.py
│   ├── management
│   │   ├── __init__.py
│   │   └── commands
│   │       ├── __init__.py
│   │       └── createcustomsuperuser.py
│   ├── migrations
│   │   ├── 0001_initial.py
│   │   └── __init__.py
│   ├── models.py
│   ├── templates
│   │   ├── common.html
│   │   ├── posts
│   │   │   ├── detail.html
│   │   │   └── list.html
│   │   └── profile
│   │       └── index.html
│   ├── tests.py
│   ├── urls.py
│   └── views
│       ├── __init__.py
│       ├── posts.py
│       └── profile.py
├── config
│   ├── __init__.py
│   ├── asgi.py
│   ├── settings.py
│   ├── urls.py
│   └── wsgi.py
├── docker-compose.yml
├── makefile
├── manage.py
└── requirements.txt
最後に
いかがでしたでしょうか?
以上の手順を踏みこんでいけば、自分で作ったWebページが簡単に表示できるので、画面やパスの設計がスムーズに進むことが期待できます。
次回は、DjangoでURLごとにWebページを見れるようにする方法について紹介いたします。
今回はここまでとさせていただきます。
最後までお読みいただき、誠にありがとうございます。
参考リンク
- 組み込みタグとフィルタ | Django ドキュメント | Django
- テンプレート | Django ドキュメント | Django