
Docker for php,mysqli and phpmyadmin
In this tutorial I will create a simple docker environment for php, mysql and phpmyadmin. We will follow some basic steps like below.
- Install docker. (I hope you already installed docker! This topic will not cover docker installation).
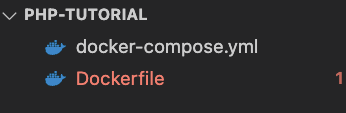
- Create a project folder.
- Create a file named’Dockerfile’ with no extension and the first word’D’ will be capital actual which I have mentioned in single quotes.
- We will create a’docker-compose.yml’ file.
After following all the above steps your folder should look like the image below.
A common question is, where I will create this project folder? Answer is anywhere on your computer!
Now open your Dockerfile file and then follow below step
In Dockerfile we will start our first command called FROM. The FROM instruction initializes a new build stage and sets the Base Image for subsequent instructions. As such, a valid Dockerfile must start with a FROM instruction.
Good News is there has a base image for php with apache which we are going to use in our php docker environment.
Command will looks like
FROM php : 8.0-apache
Next we will mention the work directory
WORKDIR / var / www / html
We also need a linux mysql environment to install mysql in a docker container. So we can install the linux library by apt-get command like below.
RUN apt-get update -y && apt-get install -y libmariadb-dev
Then we will install mysqli php extension using RUN command
RUN docker-php-ext-install mysqli
After finished this all steps your Dockerfile looks like below
FROM php: 8.0-apache
WORKDIR / var / www / html
RUN apt-get update -y && apt-get install -y libmariadb-dev
RUN docker-php-ext-install mysqli
Now we will change the docker-compose.yml file, where we will use some images which have been created and shared in docker-hub by many developers or communities worldwide! So, in docker-compose.yml file we will mention service name and port etc.
services : services :
php-env :
build : ..
volumes : volumes :
–./src:/var/www/html _
ports : ports :
–9000 : 80
Here our service name is php-env, please notice that after build we have used a dot. That means our build file or Dockerfile is in the same or root location. Here volumes mention sync your source between local and docker containers. Where before: We have also mentioned ports, if we not mentioned port it will run by default in port 80. Here, we have changed our port 80 to 9000, so our project will run in localhost: 9000 port.
Then we will just use two images from https://hub.docker.com/ , we will use below two images
For Mysql: https://hub.docker.com/_/mysqlFor phpmyadmin: https://hub.docker.com/_/phpmyadmin
Then our copy past will looks like
mysql_db :
image : mysql: latest
command : –default-authentication-plugin = mysql_native_password
restart : always
environment: environment :
MYSQL_ROOT_PASSWORD : root
phpmyadmin :
image : phpmyadmin: latest
restart : always
ports: ports :
–9001 : 80
environment: environment :
–PMA_ARBITRARY = 1
Notice the latest word with image means latest version, always recommended proper version rather than latest. Because after 10 years you may fail to run your application! For this tutorial temporarily I’m using the latest! So complete docker-compose.yml file will looks like like
services: services :
php-env :
build : ..
volumes: volumes :
-./src:/var/www/html _
ports: ports :
–9000 : 80
mysql_db :
image : mysql: latest
command : –default-authentication-plugin = mysql_native_password
restart : always
environment: environment :
MYSQL_ROOT_PASSWORD : root
phpmyadmin :
image : phpmyadmin: latest
restart : always
ports: ports :
–9001 : 80
environment: environment :
–PMA_ARBITRARY = 1
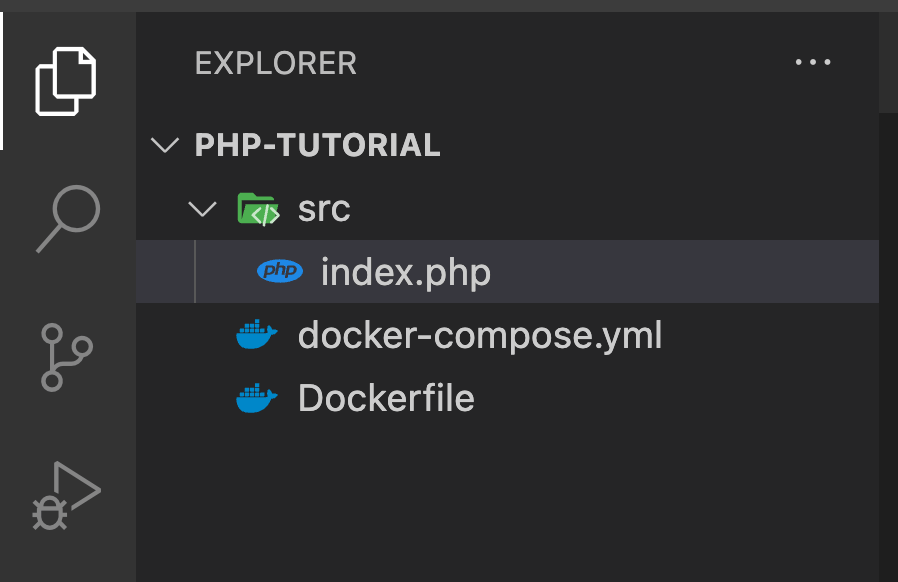
So, our Dockerfile and docker-compose file are ready! Now we will create a folder in our project directory. In the volumes we have mentioned it the name will be `src`. So, create a folder called src then create a file in So now our project file and folder directory will look like the image below.
Now run below command in
docker-compose up –builld
After complete the full process check in your
You should see hello, if you echo “Hello” in your index.php file.
Written by: Alimon Karim